By Sarah Mellings, EC Licenced Competition Coach since 2005
When riders take the time to build a good foundation with a correct position and basic training skills, they will reach their training and riding goals faster than if they skip these steps in the beginning of their riding careers. A “correct” position is determined by the style or discipline of riding you participate in. I am going to give you some of my favorite rider strengthening exercises for developing a stronger hunter seat equitation position.
One of the great things about riding is that no matter how skilled you are, your position in the saddle can always be improved upon. Before you start doing exercises to strengthen your position, you first need to understand what a correct hunter seat equitation position is. So, first we will review the rider’s body, breaking it down into four sections: the leg, base of support, upper body, and hands and arms.
The Leg
To check the length of your stirrups while mounted, take your foot out of your stirrup iron and let your leg relax down. For riding on the flat, your stirrup iron should hit slightly below your anklebone. Adjust your stirrup leathers in relation to your own body structure with the help of an experienced instructor’s eye. Place your stirrup iron on the ball of your foot with the outside branch of the iron touching your pinky toe and on a slight angle in. Let your toe slightly turn out so that the stirrup hangs perpendicular to your horse’s side, then push your heels down and in just behind the girth, and establish contact with your calf and inner knee bone. By relaxing your ankle and letting your weight “sink” into your heel, you are lowering your centre of gravity so that your leg is down and around your horse, making you more secure and tighter in the saddle.
Base of Support
You should have contact with your horse evenly distributed between your calf, your inner knee bone, and your thigh. Your seat should be placed in the forward part of your saddle, close to the pommel. Since we are focusing on exercises at the walk, this is the perfect opportunity to feel your seat bones and relax your hips by letting your horse move you. Creating a vertical line, your hips should remain directly over your heels. The security of your upper body is completely dependent upon your base and leg.
Upper Body
You want to think about having a tall body by relaxing your shoulders, looking forward with your eyes, and opening your chest and rib area. Think about lifting your chest and stomach and pretend there is a string pulling you from the top of your helmet up into the sky. A well-positioned upper body should be a completely natural, yet elegant, tall carriage.
Hands and Arms
Your goal is to have “elastic” arms while keeping a straight line from your elbow to the horse’s mouth. You want your elbows relaxed right at the place where your belt would be on your pants. A clinician I once rode with told me to think about holding a beach ball, and this worked really well to help with stiff arms. Hands should be placed just above and slightly in front of the withers about two to three inches apart, thumbs just inside of the vertical. Keep your fingers closed so that you can feel the palm of your hand with your fingertips, thumbs pressing down on the bite of the reins. Your arms and hands need to be strong enough to control your horse, but relaxed enough to allow him freedom. I like Centered Riding® founder Sally Swift’s visual of holding baby birds in your hands — you don’t hold your fingers so tight that you kill the birds, but also not so loose that the birds fly away. My students always like that one and it gets lots of laughs.
Exercises at the Walk
Two-point at the walk: When you are in your two-point position, you lift your weight off the horse’s back and put it down into your heels and stirrup irons. Think of “crouching” in the saddle, always keeping your hands ahead of your shoulders. This is the position used for racing, galloping cross-country, and in hunter seat equitation. If you are new to this position, I would advise you to bridge your reins and grab onto the mane to ensure you do not pull your horse in the mouth.
I like to have riders do many different variations with this exercise, such as placing their reins in the outside hand and putting their inside hand on their hip, arm outstretched to the side, on the head, on the small of their back, etc. I also like the rider to hold the two-point position while making upward transitions to the trot and back down again to the halt, working on developing strength and balance.
Standing in your irons: This exercise can be done at the halt, or, to make it a little more challenging, try it at the walk. Push both of your hands down onto your horse’s withers; this will ensure that if you lose your balance you will not grab your horse in the mouth. Stand up in your stirrup irons, driving your heel down and in just behind the girth, keeping your calf against your horse. Hold this position and then sink down into the front of your saddle, making every effort to keep that great leg position.
This exercise will help to establish balance and correct leg position.
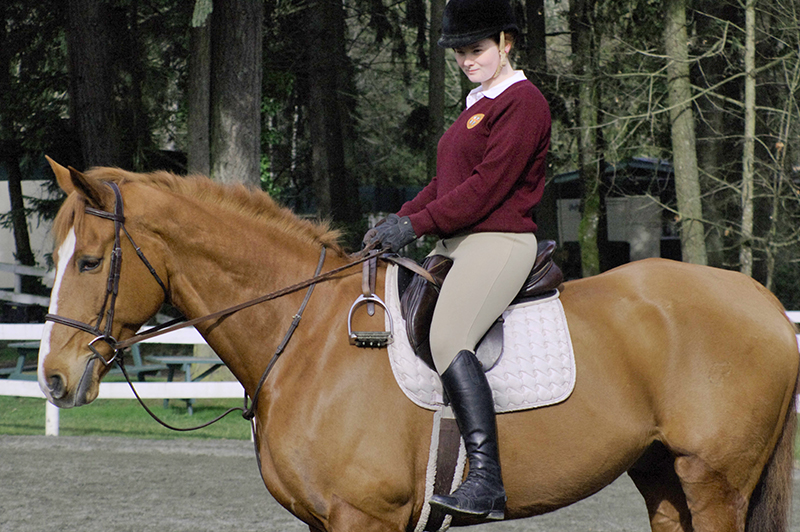
The basic position without irons. Keep your legs in position, and avoid the tendency to just let your legs hang there. Photo: Christine Coels (QMS student)
Crossing your irons: Pull your buckle down from the stirrup bar about 18 inches before you cross the stirrup over the withers. Make sure that they are completely flat under the skirt or the lump will prevent you from placing your leg correctly. Hold your leg position just as you would if you had your stirrups. Keep your toes raised, your heels down, and do not allow yourself to let your leg just “hang there.” Whenever you fall out of position, come back to the walk, correct yourself, and then continue with the exercise. To correct yourself, grab onto the pommel of the saddle, relax and lower your thighs, drawing yourself closer to the pommel while holding your leg position. What generally tends to happen is that your knees and thighs will ride up, and that in turn forces your seat to the back of the saddle, which you want to prevent.
Related: How to Master the Sitting Trot
Riding without stirrup irons is the best way to establish an independent base of support, and will teach your body to follow the horse’s movement with the small of your back instead of getting rigid and stiffening against your horse. There are many different exercises that you can work on without your irons.
Two-point without irons at the walk: This is definitely a strengthening exercise. Visualize that you have your irons, and get up into your two-point position. Hold the position as long as you can; as soon as you feel yourself slipping out of position, sit back into the seat and readjust, then get back up in your two-point position again.
The first time you try this exercise, you will be amazed at how difficult it is, but keep trying to hold the position slightly longer every time.
Exercises at the Trot and Canter
The posting trot: The trot has two beats, with the horse’s legs moving in diagonal pairs. Pick up your rising trot, checking that you are posting on the correct diagonal so that your horse is able to balance and support your weight, and making sure that your horse is in front of your leg and trotting at approximately eight miles per hour. Drop your outside iron and continue posting.
This is a great exercise, since at one time or another we all lose a stirrup iron. You want to be able to continue with your ride without losing your position and security, and having to stop and look down to pick up your iron again. By practicing this exercise, you will gain the strength, balance, and confidence to continue your ride and maintain your position while you pick up your stirrup iron.
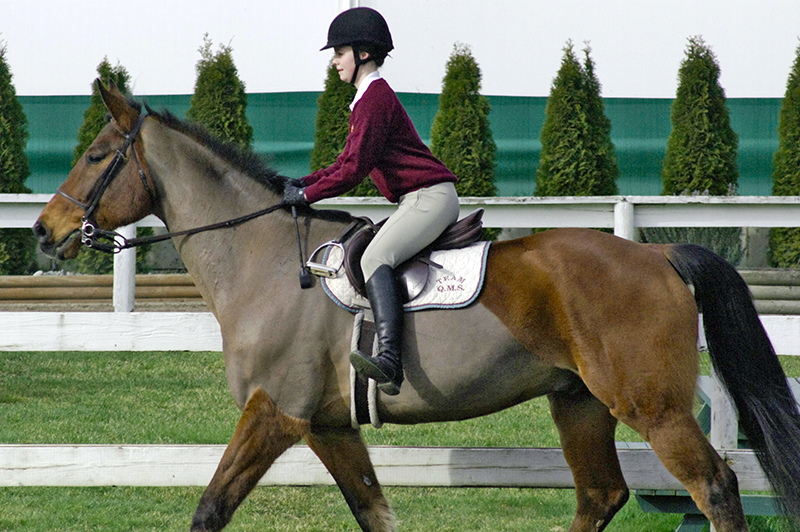
Riding in two-point without stirrup irons at any gait is a great exercise for developing a stronger leg. Your legs should be in the same position that they would be in if you still had your irons. Photo: Christine Coels (QMS student)
Dropping your stirrup irons is also an acceptable equitation test for a judge to ask. As you are posting the trot, when you drop your outside stirrup iron and continue posting, visualize that you still have your iron, keeping even contact with your horse through your calf and inner knee, toe raised, and heel down. You want to stay over the centre of your horse, keeping your hands quiet and your eyes looking straight ahead.
Related: Performing Carrot Stretches Safely & Effectively
Related: Open the Horse's Thoracic Cage
Two-point at the trot and canter: Bend your knees and lift your seat slightly out of the saddle. Pretend that your knees are giant springs, absorbing the motion of the trot. Close your hip angle about 30 degrees and drive your weight down into your leg, keeping your hip in line with your heels. Think about crouching in the saddle; both hands should be even and ahead of your shoulders, pushing down into the horse’s neck if you need to help support your upper body.
Exercises:
- Make transitions up to trot and down to walk and halt while holding your two-point position;
- Ride a change of direction, holding your two-point;
- Bridge your reins in your outside hand and, holding your two-point, put your inside hand on your hip, on your head, and outstretched to the side;
- Canter and go up in your two-point and back to your three-point (sitting) position keeping your horse’s canter rhythm and pace the same as you go between both positions.
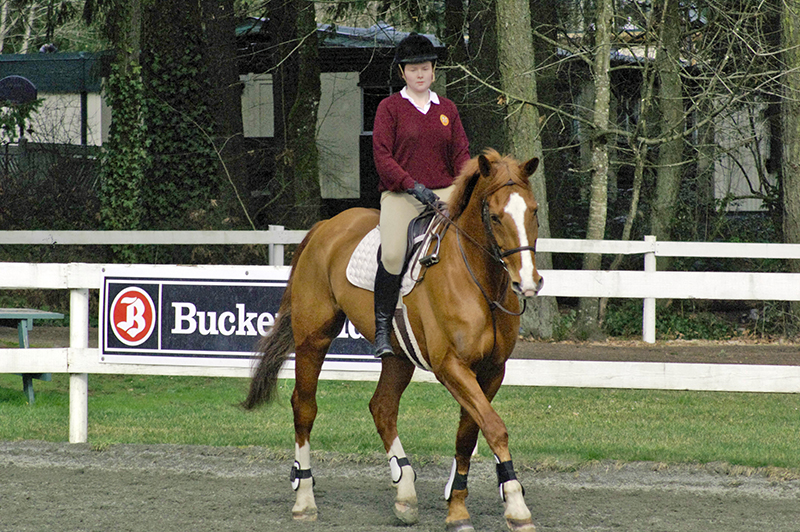
Practicing your sitting trot without irons will help you develop a longer leg position. Once you pick up the sitting trot, your leg will naturally want to get shorter so you want to constantly think about stretching your leg down, long, and underneath your body. Photo: Christine Coels (QMS student)
Up for three, down for one: This is a great one for practicing rhythm, balance, and strength in the two-point position. Pick up your trot and then get up into your two-point position. Once you are feeling balanced, hold the two-point for three beats and then very lightly, without falling back onto your seat and behind the motion, lightly touch the front of your seat to the saddle for one beat.
When you first try this, count out loud — “one, two, three, sit, one, two, three, sit.” This will help you keep the rhythm and tell you right away if you are doing the exercise correctly. You can of course make up your own variations to this exercise, going up for as many beats as you like and then sitting for one. Once you are feeling stronger, go ahead and give this one a try without your irons!
Sitting trot and canter without irons: This works to develop a longer leg position. Before you head out to the rail, bring your leg out and away from the saddle, and then wrap it down and around your horse, keeping your toe raised and heel down. Once you pick up the sitting trot, your leg will naturally want to get shorter so you want to constantly think about stretching your leg down, long, and underneath your body.
Related: Routines for a Balanced, Engaged Horse
Related: The "Whys" of Good Rider Position
Exercises:
- Sit the trot with one hand on the pommel of your saddle, to work on correcting your position;
- Press one arm to the middle of your back in the sitting trot, working on improving your posture;
- Upward and downward transitions from sitting trot to canter, keeping that long leg position;
- When you feel your position slipping, make a transition down to walk to re-establish your correct position and then continue with the exercise you were working on.
Posting trot and two-point without irons: This works at developing a stronger leg. Your legs should be in the same position that they would be in if you still had your irons. Place your legs in the correct position at the walk, and then pick up your working trot, again checking that you are on the correct posting diagonal.
Exercises:
- Post the trot without your irons; when you feel yourself fall out of position, walk and correct;
- Two-point position at the trot and at the canter, keeping that correct leg position;
- To push past your comfort zone, when you are beginning to feel uncomfortable, find a focal point and continue to ride without your irons until you get to it.
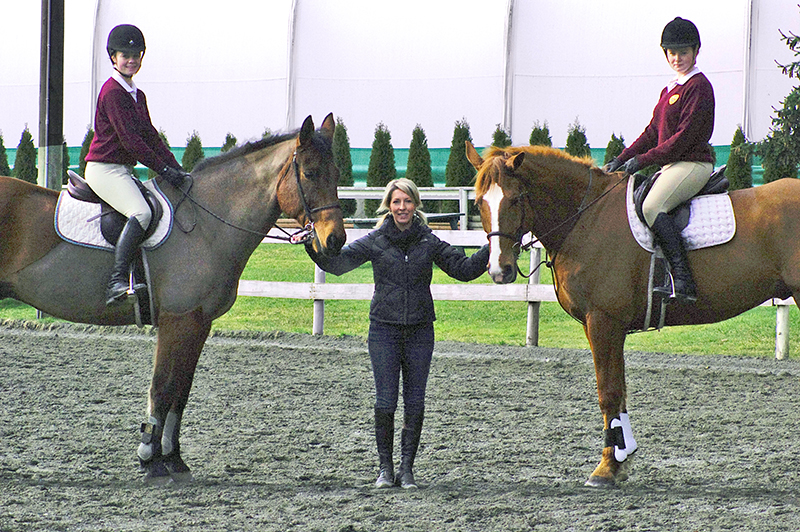
Author Sarah Mellings with demonstration riders and QMS grade 12 students Juliet Westlake (left) and Elizabeth Graham (right). Photo: Christine Coels (QMS student)
These are just a few of many different exercises that you can practice with and without your irons — you just need to be creative. Remember that you should slowly introduce these exercises into your regular riding sessions for just a few minutes every day. It takes time to build new muscle memory, so as much as you want to push your fitness level, you also need to take care not to overdo it and hurt yourself.
By incorporating these exercises into your regular training program, you will become a more secure and therefore a more relaxed rider.
Stay positive and good luck with your riding goals!
Related: Ride with Balance, Flexibility & Strength
Related: Pilates for Every Equestrian
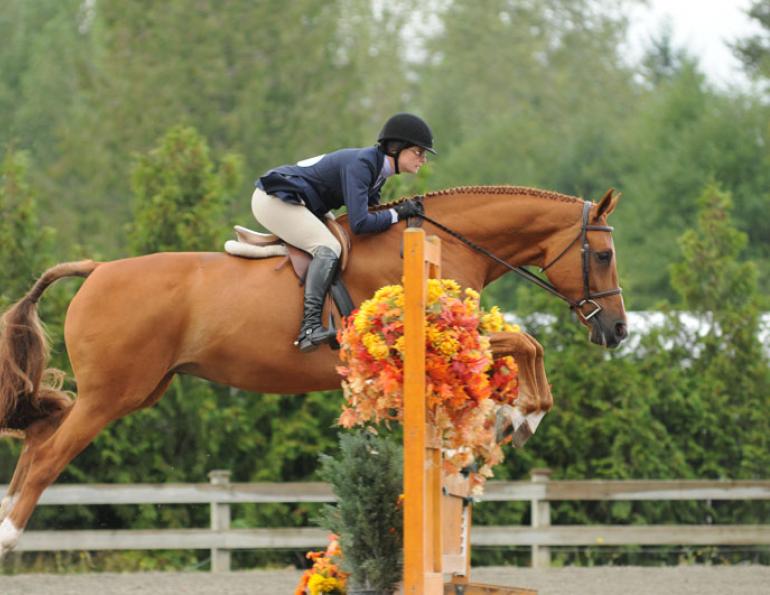
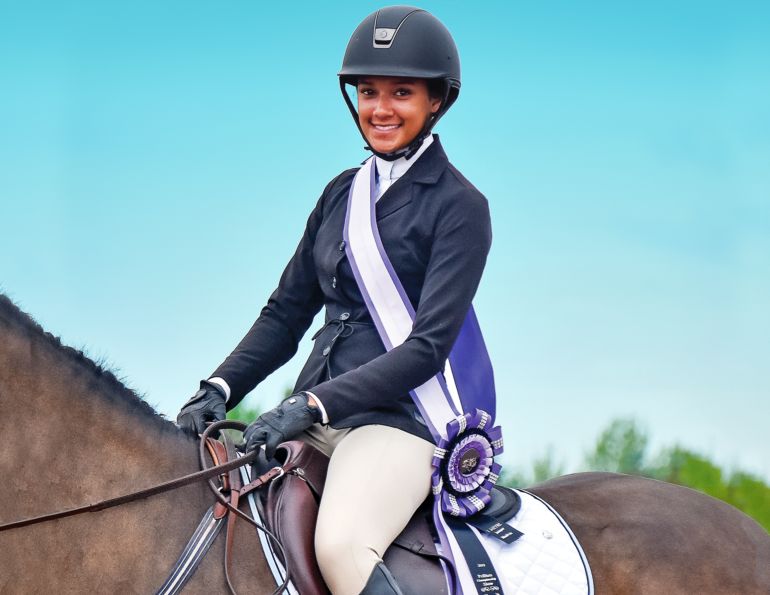
Main photo: Correct position is the foundation of all effective riding and allows you to ride efficiently while expending the least amount of energy. Here, QMS alumni Danielle Fritz, DVM, demonstrates a strong hunter seat equitation position with a good lower leg. Photo courtesy of Sarah Mellings


